Nail Art
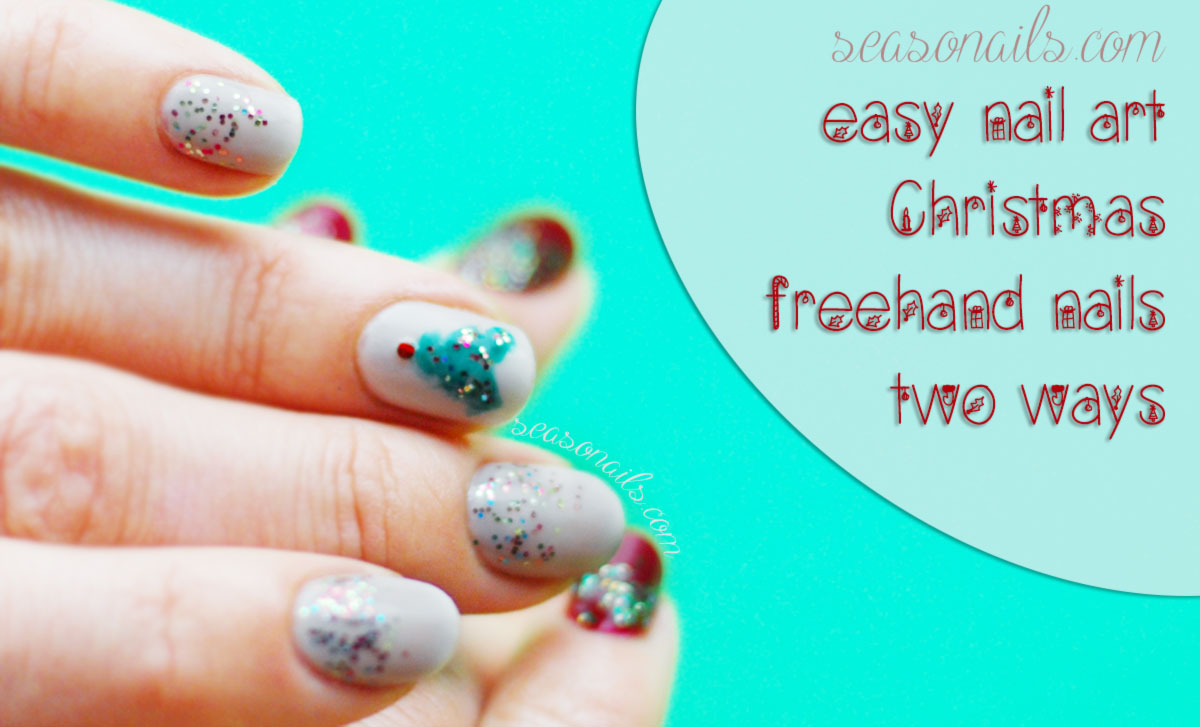
Easy Freehand Christmas Nails Two Ways!
If the word alone frightens you, know that this type of freehand art is so forgiving and the end result is so beautiful, you wouldn’t believe it’s actually you who did it! Surprised, huh? Scroll down, you can do it!
Time is always of the essence and this is one of the main reasons I treasure versatility and simplicity when it comes to nail art (and more). Even if you’re a fan or darker nails or beige-neutral nails, this type of nail art is easy and really catchy, especially for Christmas! Get your nails in shape by following the Nail Care routine that’s going to revolutionize your nails forever!
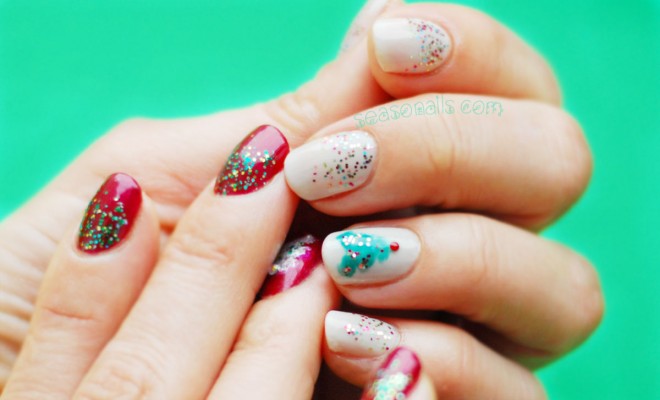
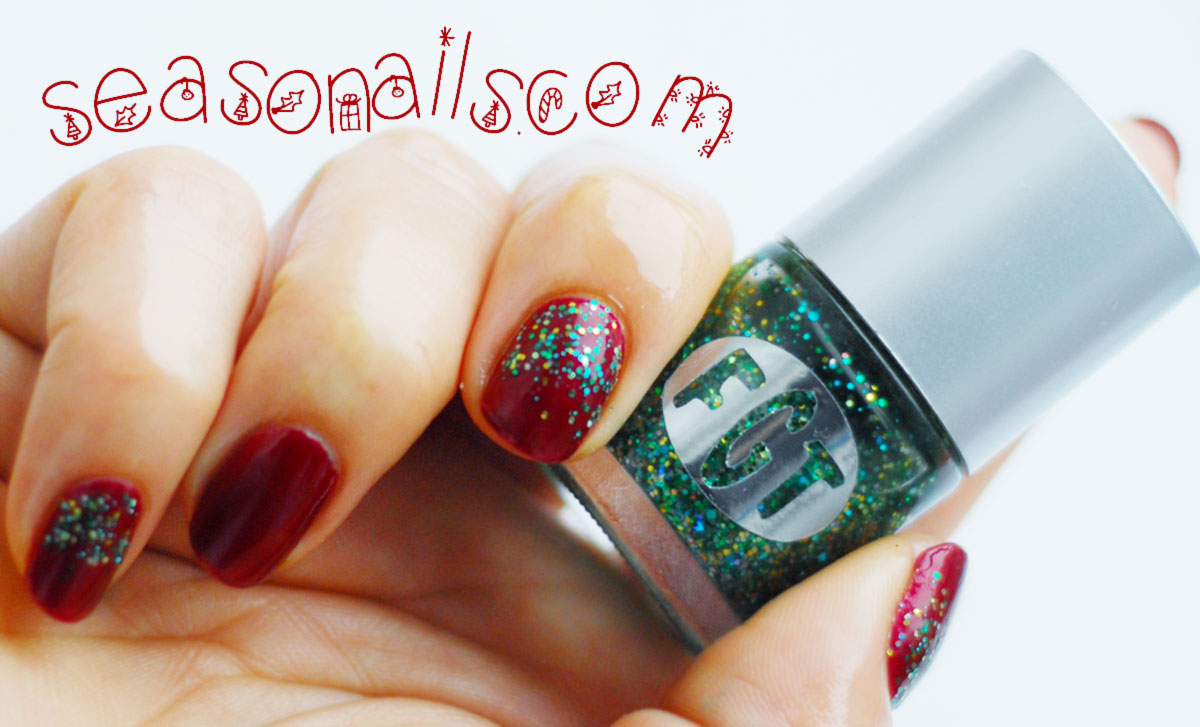
Start by painting your nails in the base of your choosing: I opted for a French base on one hand and for a deep, rich wine red on the other. Actually, this type of incoherent manicure is what I often do – paint two variations on the same theme – one on the right and the other on the left hand. Because I love both nail arts just the same and can’t decide which one should be dominant. So I wear them both.
Yeah, it kinda raises eyebrows. The strange nail case of Jekyll and Hide, huh?

If you’re not feeling comfortable getting into the freehand thing at once, you can start by making the glitter gradient on the non-accent nails, both hands. For the neutral nails I went for a superior gradient and for the wine nails I opted to cover in glitter the nailbed nail. There’s no right or wrong there, just do as you feel like it, up the nail or down the nail, the essence is that it shines and sparkles!
If you’re asking yourself how the glitter gradient is done – it’s a dabbing technique – just coat with one layer until the desired length (or depth) of the gradient and the dip the brush in glitter and dab here and there, with each dabbing going more uphill or downhill, depending on where you chose to place your gradient. It’s important you do now cover the entire nail in glitter to obtain the correct gradient effect!
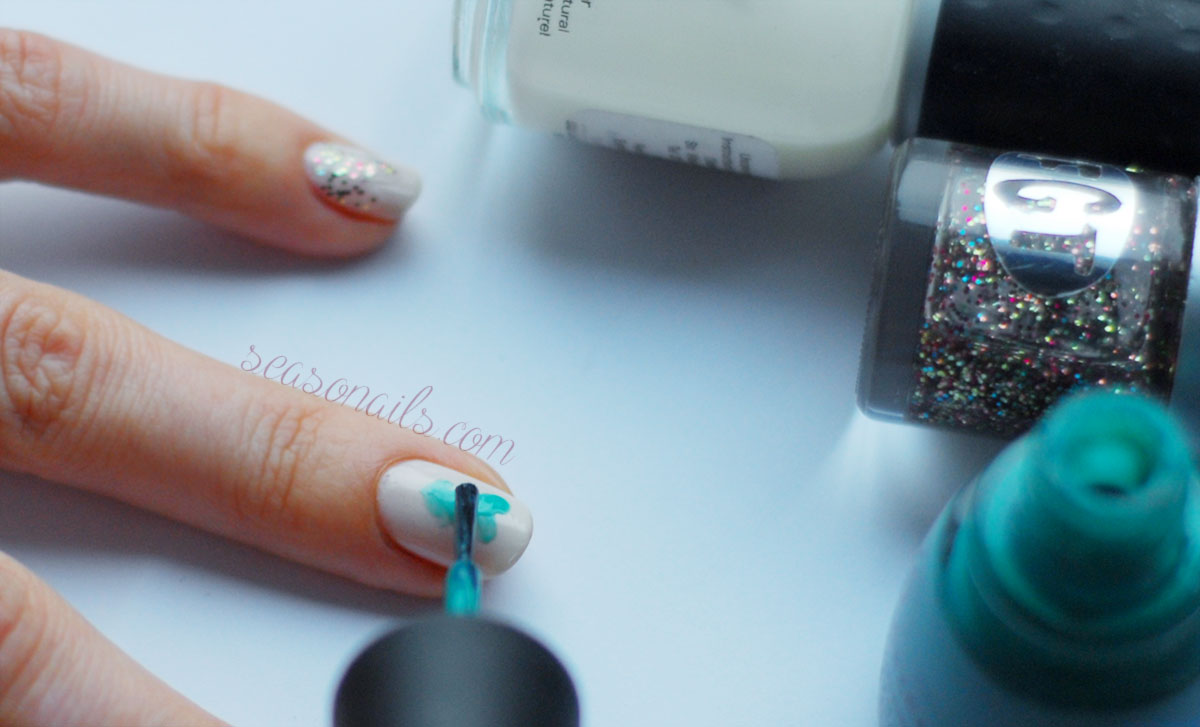
Ready? We’re going for the freehand accent nail! Today we’ll be drawing a Christmas Tree! It’s SO easy! All you need is the brush provided in your nail polish bottle! Go for a lovely green on the neutral nails and a metallic silver on the wine nails! Start from the bottom of the tree, where the larger branches are. The tip of the tree should point towards your finger, so your tree base is closer to the free edge!
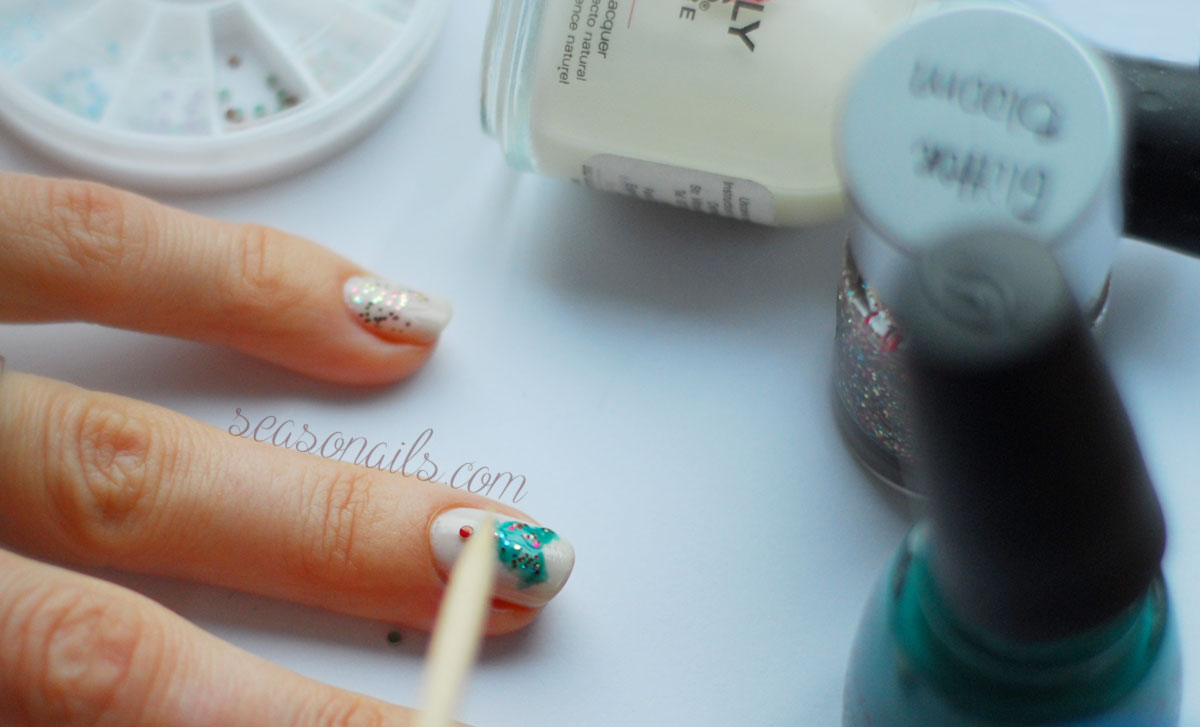
We all know how Christmas Trees look like, right? So the bottom of the tree is like a triangle without a base. Don’t worry if it looks messy, it’s supposed to! Going upward, you need to make the middle branches, less wide than the base branches, step back a bit and make sure your tree doesn’t bent towards the left or the right and then top it up with the upper branches! Remember, the tip should point towards the finger, not meet it – you have to leave a bit of space for the tree top – a bead or a shiny crystal or whatever else flights your fancy!
Now that you finished on your dominant hand, go ahead and make the tree on your non-dominant hand’s accent nail! When you finish, take the same glitter you used to create the gradient and dab here and there on your trees to make the decorations! Place the top on your trees, get your topcoat at hand and finish your beautiful Christmas mani! You’re a Freehand master now!
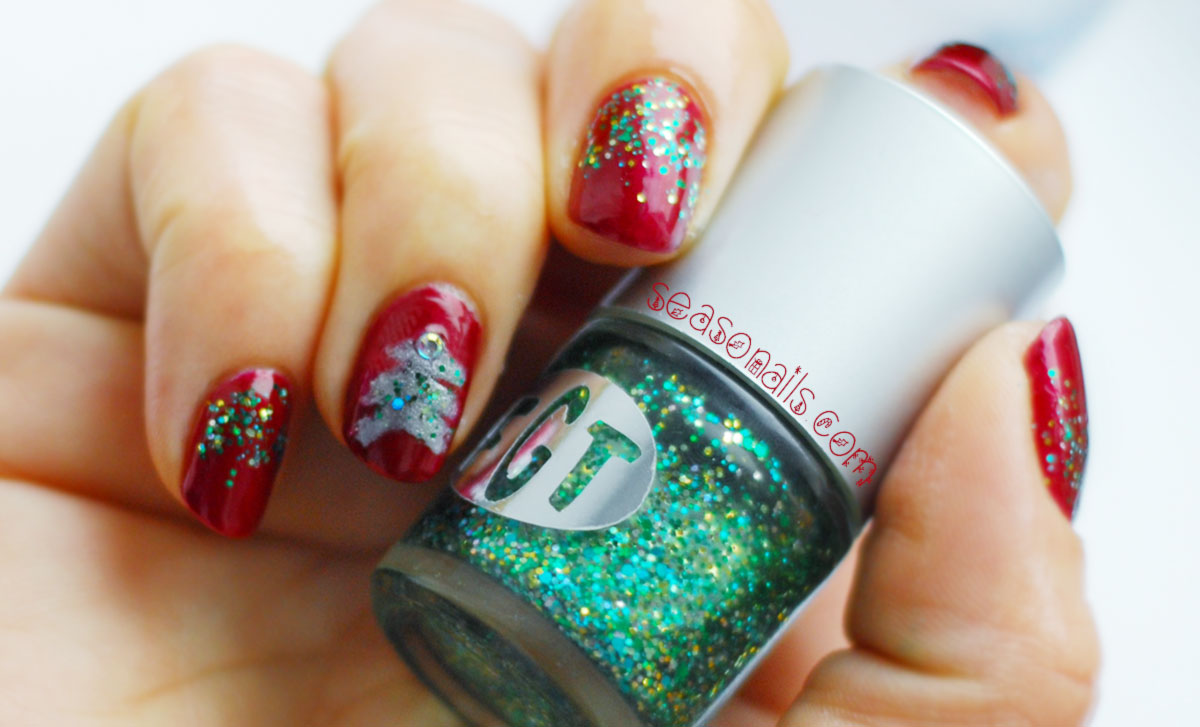
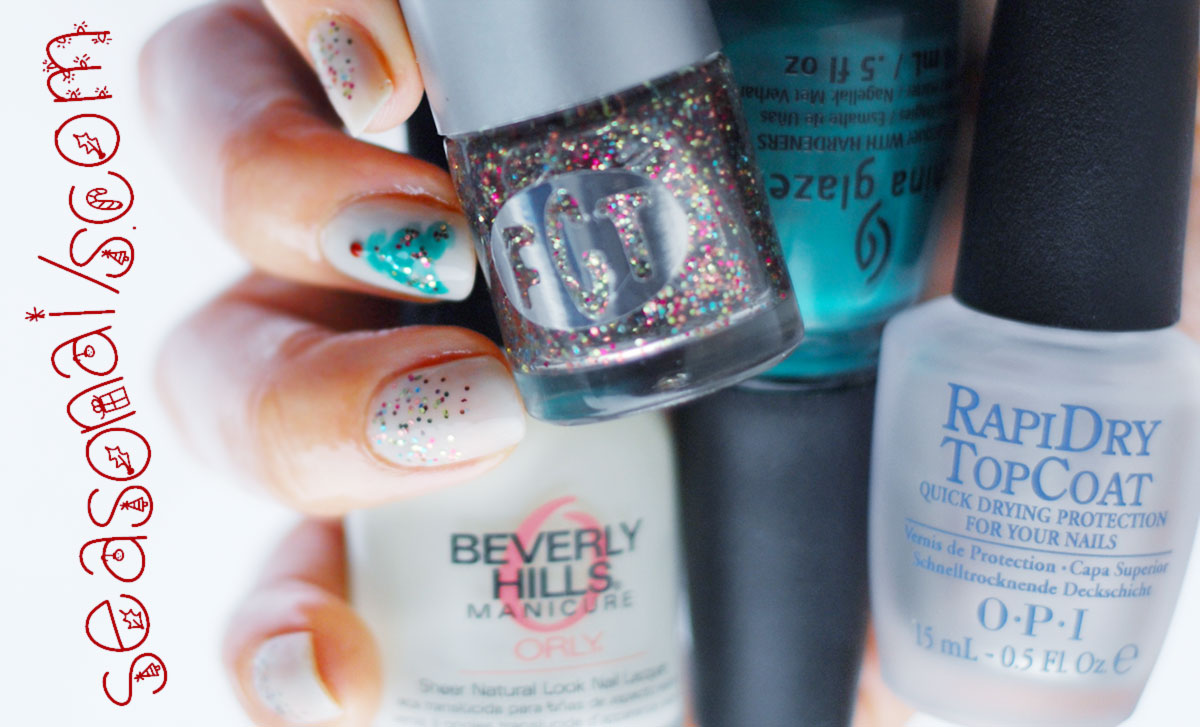
I used Orly’s Beverly Hills Manicure for the French base mani and FGT Glitter Bloom for the glitter gradient and the tree decorations – the tree was made with China Glaze Keeping it Teal green. For the wine nails I used Peggy Sage Taffeta burgundy and FGT Fields of Green for the glitter gradient and the silver tree decorations (the metallic silver polish was just a random lacquer I had on my stash – I have it for so long, the labels are all erased and I can’t remember where I picked it up…) . I placed a red stud on the green tree and a silver crystal on my silver tree.
For more winter nails fun, check out Elsa’s Frozen nails!


Latest Comments