
Nail Art
Spring 2015 Chanel Nails
Black and white is such a huge part of this Spring/Summer’s fashion, it’s definitely worth considering expanding one’s nails repertoire with more and more designs hinting at the style trends of the moment! So if you enjoyed my Dior nails, now let’s explore another fashion giant!
Both in fashion and beauty, Chanel always sets new standards of class and elegance we can only admire and follow the best we can. Today I chose a Spring-Summer 2015 model to replicate – edgy, fun, and totally wearable!
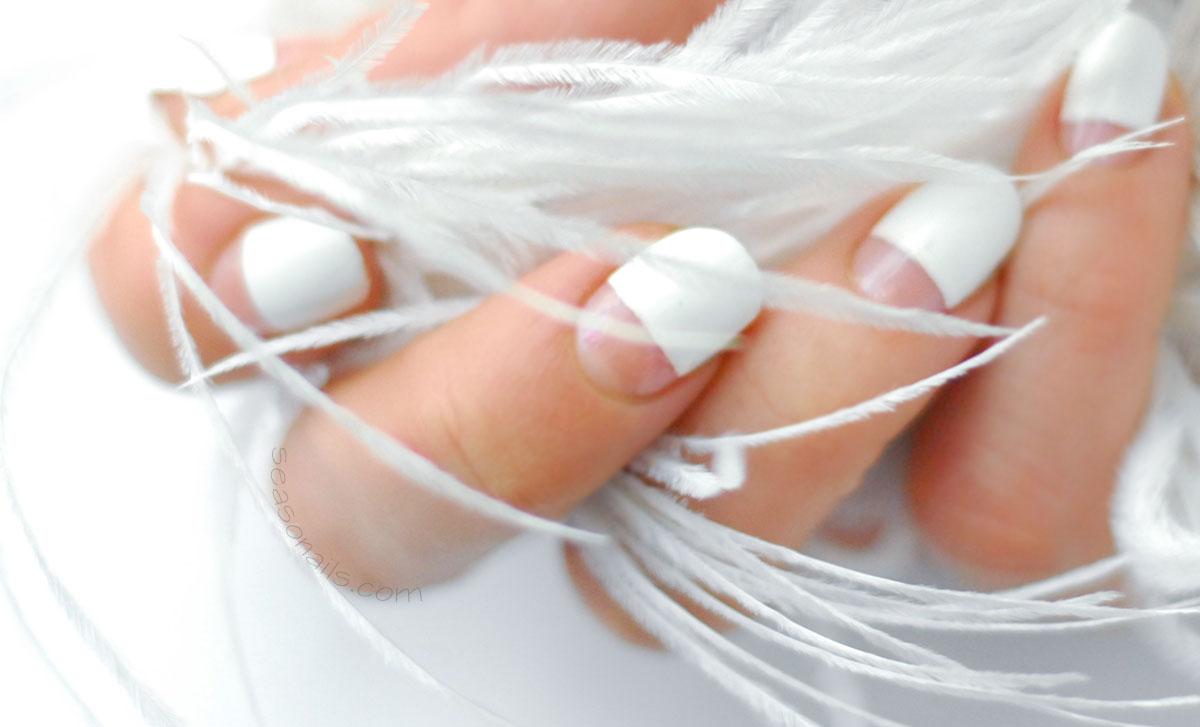
Start by painting your nails with a natural transparent shade, after your base coat is completely dry (a quick reminder to read the Nail Routine that’ll keep your nails healthy and fabulous!). I went for Opi’s Rosy Future as you’ve seen before it’s one of my favorite nail polishes. Allow it a good 10 minutes to dry, just enough time to go through the Nail Care at home guide!
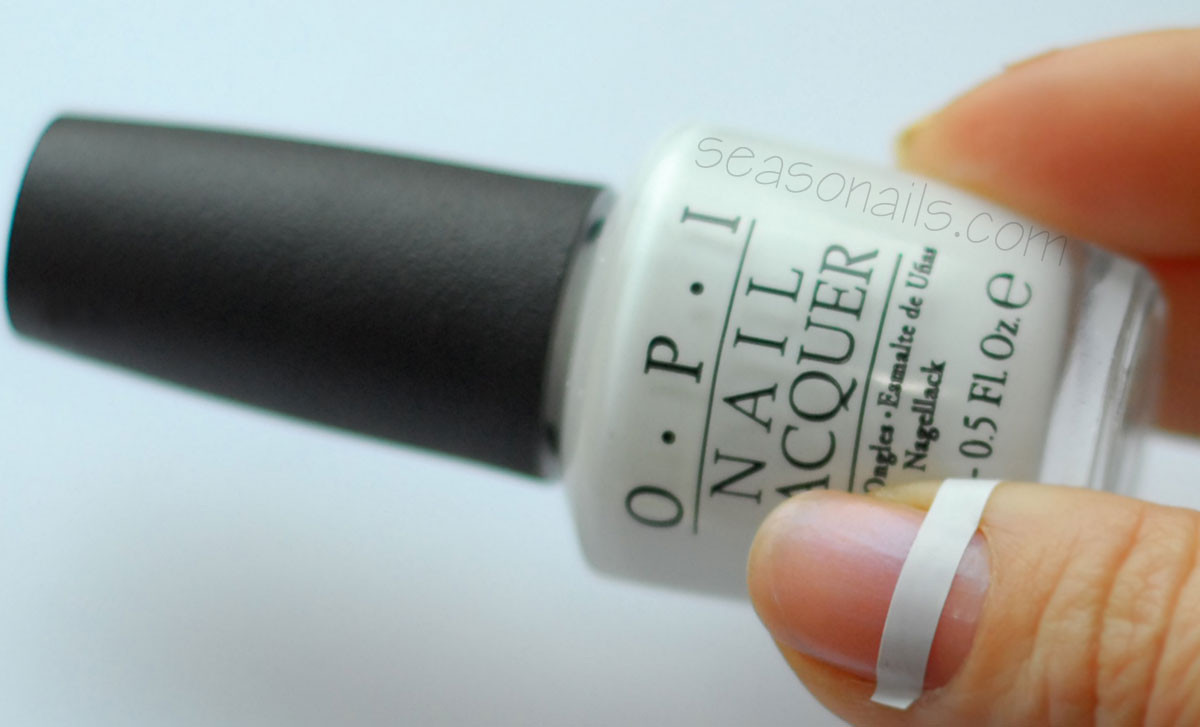
Now pick up some striped tape to help you paint a straight contour like the strapless dress. (I used electrical tape because it’s very elastic and adheres perfectly to any curve of the nail. The only downfall is that it’s fairly sticky and after removal, you’ll need to de-grease your nails with rubbing alcohol to take away the sticky residue. But even so, I’m ok with that because it’s way more elastic than any paper tape.)
See also: How to make fabu freehand nails quick&easy!
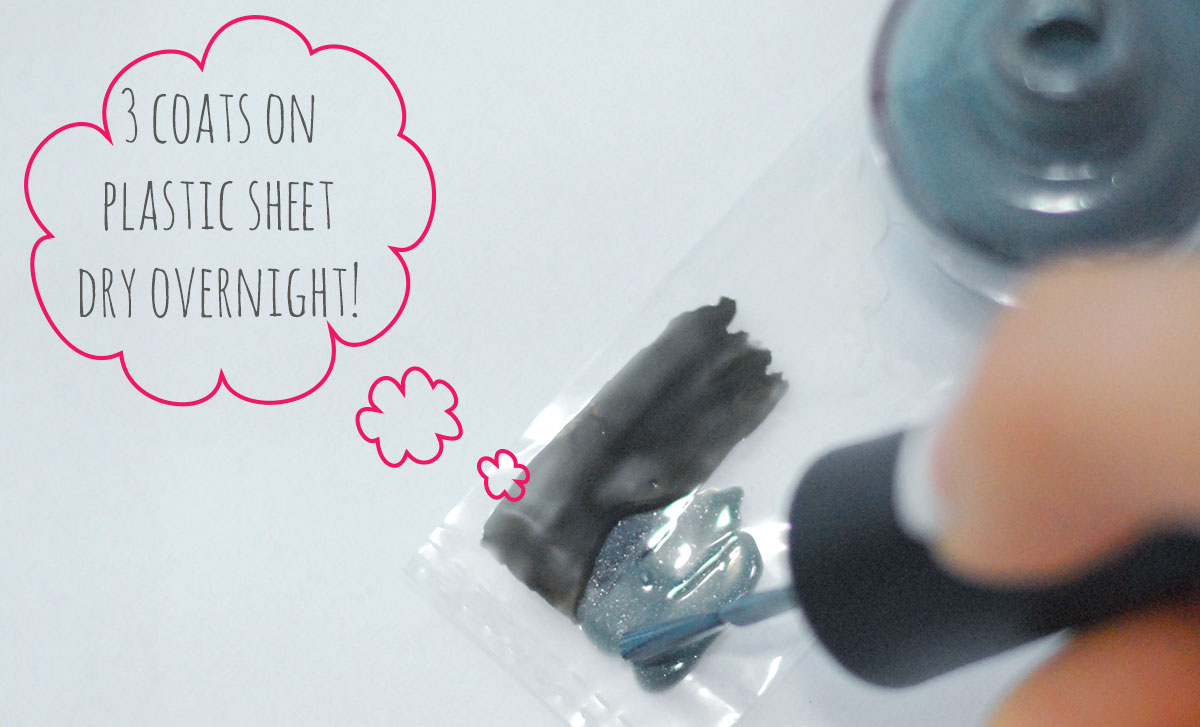
Since the stripes aren’t even, I think a little striping nails decals is in order – to spare you all of the horrors of my freehand striping! So what you need is a sheet of plastic and the nail polish in the color of your choosing. A LOT of nail polish! Somehow, the polish looks always uneven on a plastic sheet, I coat three times and I still have doubts! So I added OPI Black Onyx and OPI I Have a Herring Problem. Let dry overnight (now is the time to check out my barely-started Seasonails Youtube Channel and show me some social love on Seasonails Facebook page, Seasonails Instagram account or Seasonails Twitter! – and be generous with that love, tell your friends and keep busy sharing and commenting coz’ you’re not touching those decals tonight!)
See also: My very first video tutorial for the Penguins of Madagascar nails!
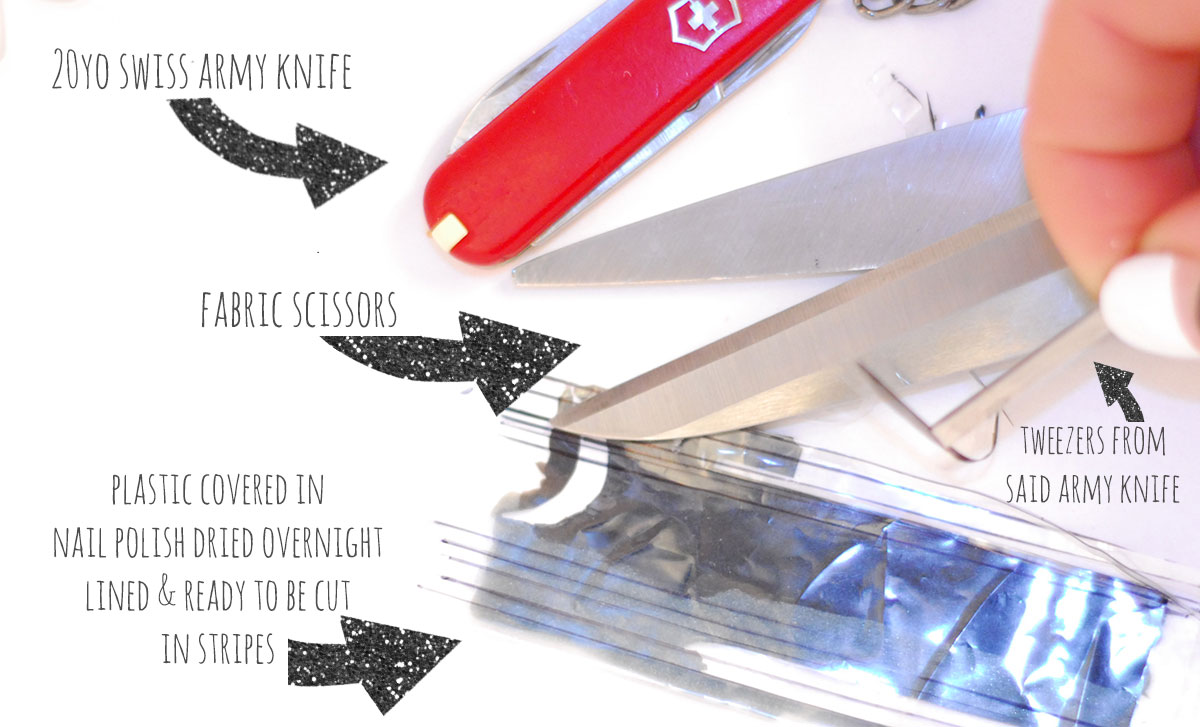
After a good night sleep, prepare a ruler and a marker, if you’re like me and your straight lines look more like ocean waves than crisp straight lines! After you’ve traced the lines, take your favorite scissors and cut away! I think some of you may disagree with my fabric scissors choice, but I misplace my scissors, my phone and my socks constantly, so please be gentle with me!
Yaaay! Look at those beautiful straight lines! Aren’t they perfect? – yeah, I know they’re not, but I just had my morning iced coffee and now everything looks peaches!
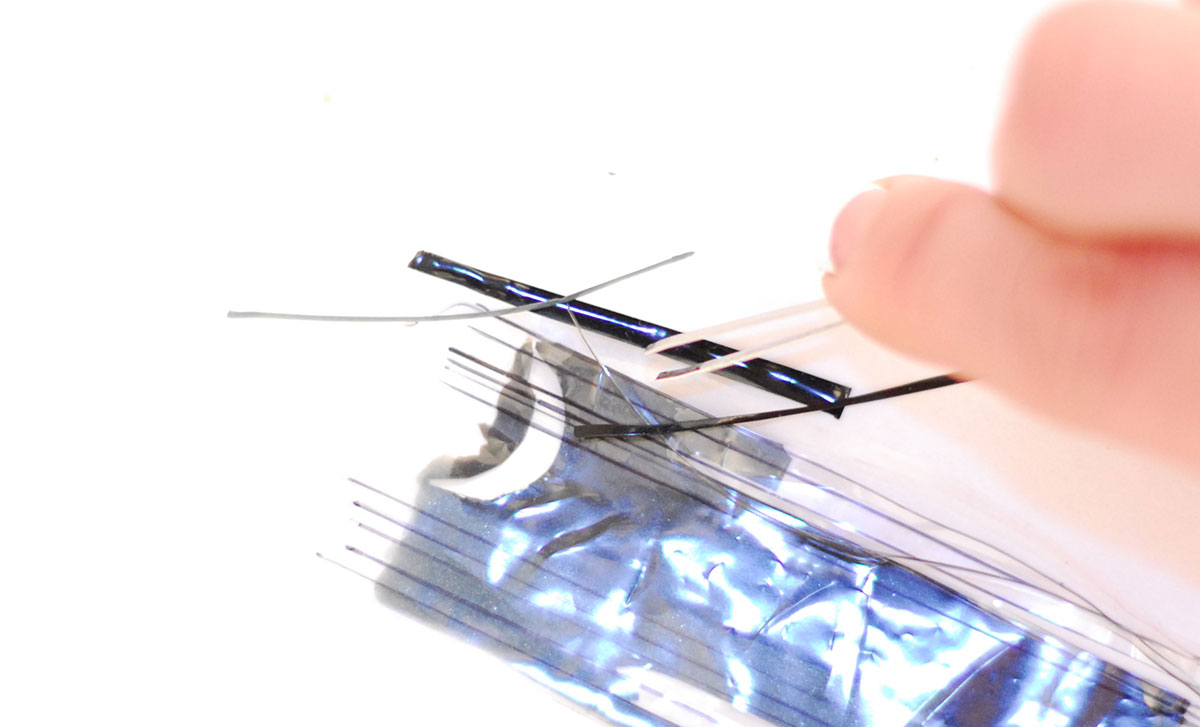
Where was I? oh, the Chanel nails! Coco herself couldn’t do it better, mark my words – prepare your stripes at the desired length and keep them close, and throw a pair of tweezers in the game too! What you’re mumbling about? It’s a perfectly functional pair of tweezers from my Swiss Army knife! I feel nostalgic about it, I’ve had it for 20 years!
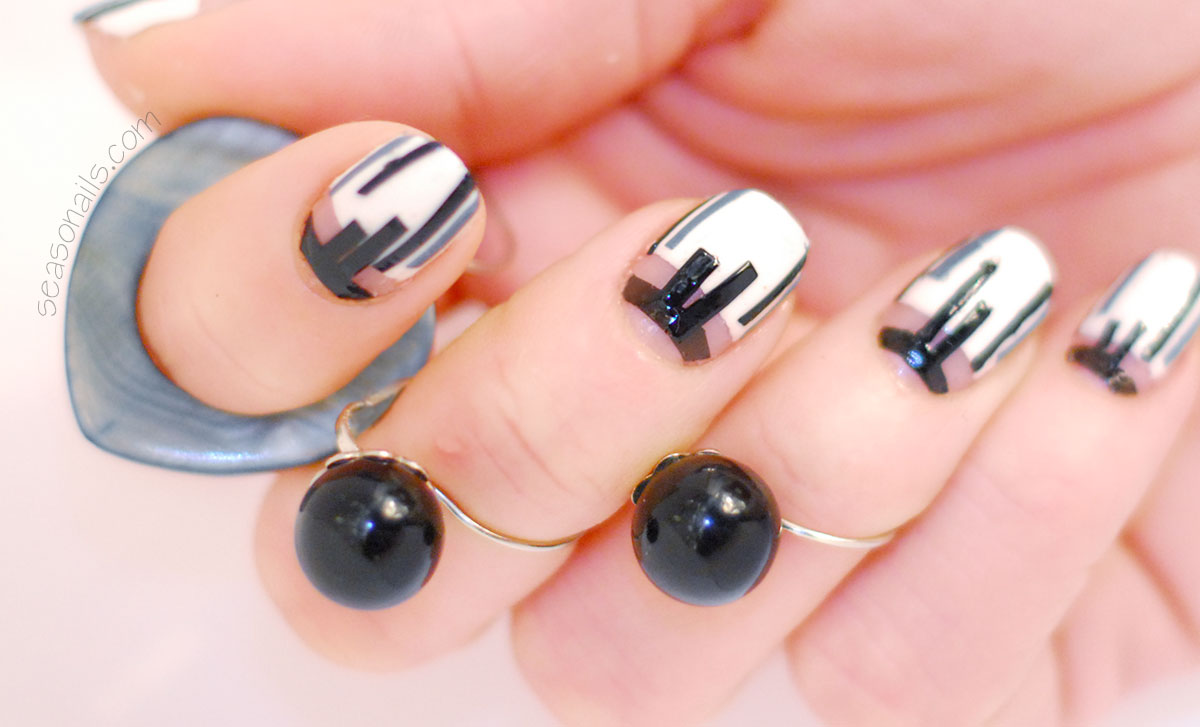
place the stripes. Yessss, beautiful! Cut a rounded shape to mimic the neck stripe decoration, cover everything with a nice shiny coat of quick dry polish. Or any topcoat as long as it’s clear and shiny and longlasting! Voila! Chanel Manicure Mesdames et Mademoiselles! Tres chic!


1 Comment